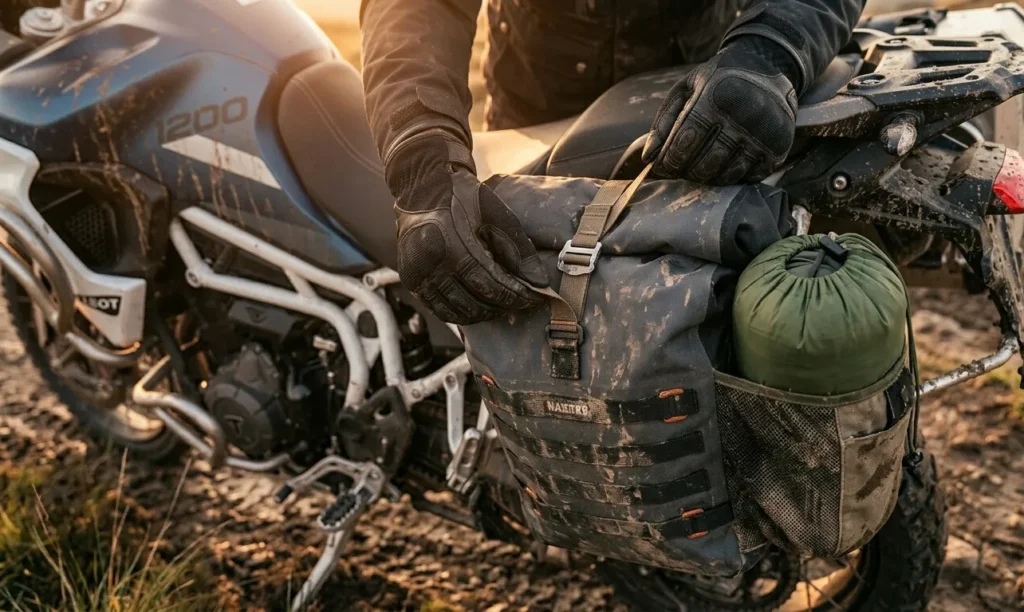
I’ve seen it a thousand times at rallies and trailheads, a rider with a bike so overloaded and top-heavy that they can barely keep it upright at a stoplight. They’ve got a massive dry bag sitting three feet high on the rear rack and two more bags strapped to the sides, making the bike look like a wandering yard sale.
I used to be that guy. On my first real tour, I just threw everything into a huge duffel, cinched it down with bungees, and hit the road. By the first corner, I realized I’d made a huge mistake. The bike felt slow to turn, the front end was wandering at highway speeds, and every time I came to a stop, I felt like I was wrestling a bear.
Packing a motorcycle for camping isn’t just about finding enough room; it’s about physics, and if you get the weight distribution wrong, you’re turning your dream trip into a dangerous chore.
The #1 rule I live by now is Heavy Low, Light High. You want your densest, heaviest gear, like your tool roll, your stove, and your water, to be as low as possible and as close to the center of the bike as you can get it. This keeps your center of gravity low, which actually helps the bike feel more stable rather than less.
When I’m checking items off my motorcycle camping checklist, I’m constantly thinking about where each item will live. If I’m carrying a heavy, garage-style shelter like the Wolf Walker Motorcycle Tent, I know I’m going to have to make compromises elsewhere to keep the bike balanced.
On the other hand, if I’m running a minimalist setup with the Big Agnes Copper Spur, the whole packing process becomes ten times easier because the weight is almost negligible.
According to the handling experts at RevZilla, even a 10-pound shift in where you place your gear can change your braking distance and how the bike tips into a corner.
I’ve found that a well-packed bike actually handles better than a bike with a single, massive top box because the weight is distributed across the frame. In this guide, I’m going to walk you through exactly how I organize my panniers, how I secure my dry bags, and the expert insights I’ve gained from thousands of miles of trial and error.
We’re going to make sure your bike handles like a dream, even when you’re carrying everything you need to survive for a week in the woods.
Should you use hard panniers or soft bags for your motorcycle camping trips?
I’ve spent years caught in the middle of the hard vs. soft luggage debate, and honestly, the right answer depends entirely on what kind of rider you are. When I first started out, I was a die-hard fan of aluminum boxes.
There is something incredibly satisfying about the security of a hard pannier. I can pull into a diner, lock my Big Agnes Copper Spur and my electronics inside, and walk away without that nagging anxiety that someone is going to slice open my bags with a pocketknife.
Plus, in a campsite, a hard pannier doubles as a perfect flat surface for your stove or even a stool if you forgot your camp chair. If you’re a pavement-to-gravel rider who stays on established roads, hard cases are essentially the “gold standard” for organized packing.
However, once I started pushing into more technical off-road trails and the Backcountry Discovery Routes (BDR), I realized why so many adventure riders swear by soft bags. Here’s the expert insight I learned the hard way: in a tip-over, a hard bag can be a leg-breaker.
If you catch your calf under an aluminum box while paddling through sand, it’s going to hurt. Soft bags, like the ones from Mosko Moto or Kriega, are much more forgiving. They also don’t bend. I’ve seen aluminum panniers get so warped after a minor drop that they wouldn’t seal anymore, which is a disaster when you’re heading into a rainstorm.
Soft bags also force you to be a more disciplined packer because they don’t have that fixed volume; you have to be more intentional about how you squash your gear down.
According to the experts over at Adventure Rider (ADVrider), the choice usually comes down to safety vs. security. For me, I tend to match my luggage to my tent. If I’m using a massive setup like the Wolf Walker Motorcycle Tent, I almost always need hard racks to support that weight.
But if I’m running a minimalist setup, a soft-luggage system keeps the bike narrow and flickable. When you are looking through my best tent for motorcycle camping guide, pay close attention to the pole lengths. If you choose soft bags, you really need those short poles because soft bags don’t handle long, rigid items very well.
They tend to create pressure points that can eventually wear a hole through the fabric. Ultimately, your luggage is the skin of your bike, and your tent is the bones. Make sure they play nice together.
Where to put your tent, sleeping bag, and kitchen?
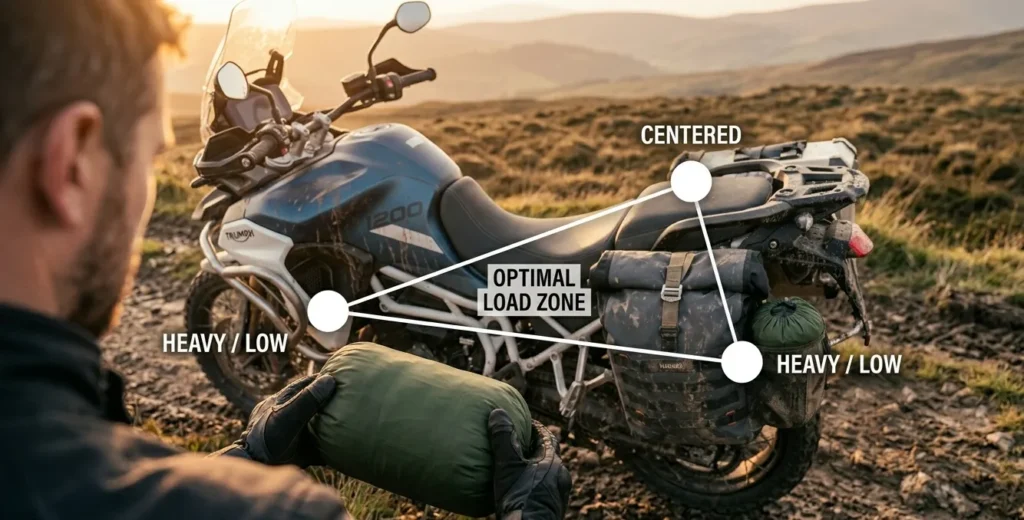
The Golden Triangle of packing is a concept I developed after years of picking my bike up out of the dirt because I made it too top-heavy. Think of your bike as a tripod: you have your two side panniers and your rear rack.
If you get the balance wrong between these three points, you’re going to feel every single pound in the handlebars. I always prioritize my heaviest and most essential gear, the tent, the sleep system, and the kitchen, within this triangle to keep the bike’s center of gravity as low as possible.
In my best tent for motorcycle camping guide, I talk about how different tents require different placement strategies, and this is where that really comes into play.
My tent placement is 100% dictated by the length of the poles. If I’m carrying my Big Agnes Copper Spur HV UL2 Bikepack, those 12-inch poles allow me to shove the whole setup at the very bottom of my left pannier.
This is the gold standard because it keeps the weight low and tucked into the frame. However, if I’m taking a classic like the The North Face Stormbreak 2, those 22-inch poles aren’t going in a side case.
In that case, the tent moves to the top of the triangle, the rear rack. I’ll strap it horizontally across the seat using Rok Straps.
According to the handling experts at Cycle World, keeping that weight centered over the rear axle is crucial to prevent the front wheel from becoming too light and flighty at highway speeds.
The second point of the triangle is my sleep system. I usually pack my sleeping bag and pad in the opposite pannier of the tent.
This balances the bike out side-to-side. I always put these in a dedicated dry bag, even if my panniers claim to be waterproof, because waking up in a wet down bag is a mistake you only make once.
Lastly, the kitchen goes in the most accessible spot, usually at the top of a pannier or in a tank bag. I want to be able to grab my stove for a quick roadside coffee without unstrapping my whole life.
I’ve found that a last-in, first-out strategy for the kitchen makes lunch stops way more enjoyable. When you’re looking at your own gear, remember that the golden triangle isn’t just about where things fit; it’s about how they affect the ride.
I once tried to put my heavy Wolf Walker Motorcycle Tent at the very back of a long luggage rack, and the bike felt like it wanted to wheelie every time I hit the throttle.
By moving it forward onto the pillion seat, the handling returned to normal. It’s all about keeping that mass centralized. If you’re struggling with space, check out my Kelty Late Start 2 review.
Its 16-inch poles are a great middle-ground that can fit in many panniers diagonally, helping you keep that golden triangle tight and low.
Why bungees are the enemy of a stable motorcycle?
Listen, I’m going to be very direct here: if you are still using those cheap, stretchy bungee cords to hold your $600 tent to your bike, you are playing a dangerous game. I’ve been that guy.
I remember flying down a highway in Nevada at 75 mph when I felt a weird thump against my leg. I looked in my mirror just in time to see my tent bag sliding sideways, held on by a single, frayed bungee that was stretched to its absolute breaking point.
If that cord had snapped, my tent would have been a tangled mess in my rear wheel, which is a great way to turn a fun trip into a high-speed disaster. Bungees are the enemy because they don’t actually secure a load; they just suggest that it stay in place.
They allow for load shifting every time you hit a bump or lean into a corner, and that shifting is exactly what makes a bike feel squirrelly and unpredictable.
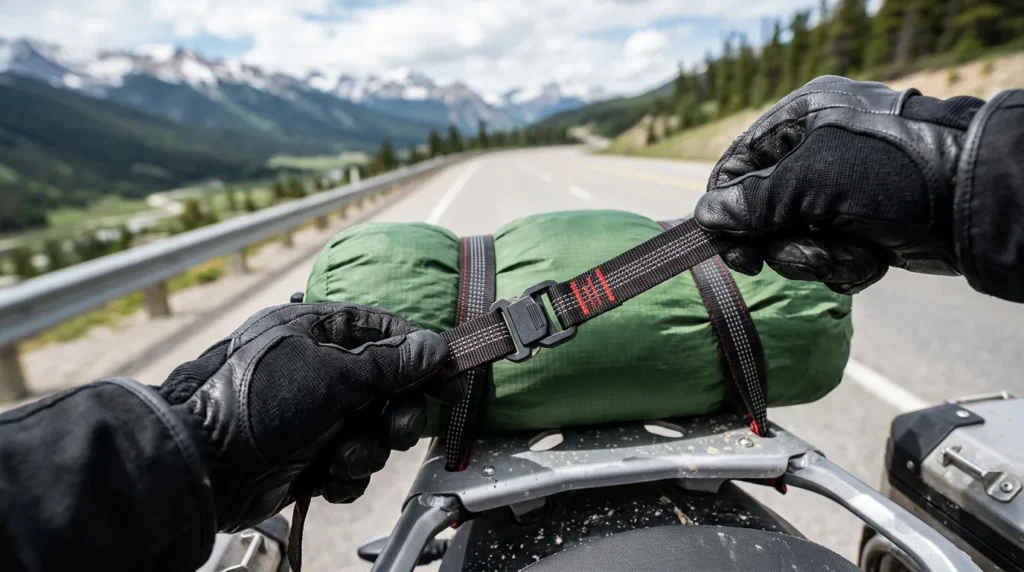
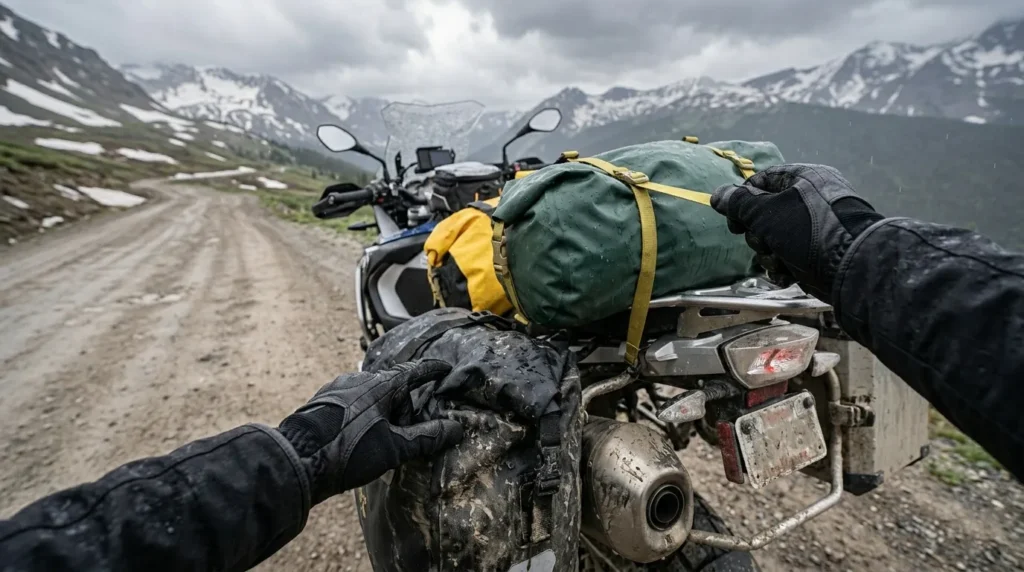
The only real solution for us riders is a set of Rok Straps. If you haven’t used these yet, they are going to change your life. They use a combination of heavy-duty webbing and a solid rubberized elastic section.
You loop them around your frame or rack, click the buckle, and then pull them tight. Because the elastic part is so stiff, it maintains constant tension on your gear even as it settles during the ride.
I’ve used them to secure everything from a tiny dry bag to the massive 12-pound Wolf Walker Motorcycle Tent, and I’ve never had a load shift on me.
According to the safety experts at RevZilla, using non-elastic webbing or high-quality hybrid straps like Rok Straps is the only way to ensure your luggage stays fused to the motorcycle’s subframe.
When I’m packing a bulky item like the ALPS Mountaineering Lynx 2, which has those long 21-inch poles, I am extra careful with my strap placement. I always use two straps in a cross pattern or parallel to each other, ensuring they are pulling the bag forward against my seat or a solid part of the rack.
This prevents the teeter-totter effect. My expert insight here is to always check your straps after the first 20 miles of any trip. Vibration has a way of settling fabric and foam, and what felt tight in your driveway might be loose after a few miles of road buzz.
If you’ve read my best tent for motorcycle camping guide, you know I prioritize gear that fits inside the bags, but when you have to strap stuff to the outside, you need to do it with hardware you can actually trust.
Ditch the bungees, buy some real straps, and stop worrying about your gear flying off into the sunset.
Keeping your tent and sleeping bag bone-dry regardless of the weather
I’ll tell you right now: there is no such thing as a truly waterproof motorcycle pannier after a 10-hour day of riding in a tropical-grade downpour. I’ve owned the most expensive aluminum boxes on the market.
While they are great, the constant vibration of the road and the flexing of the bike’s frame can eventually cause those rubber seals to fail just enough for moisture to creep in.
There is nothing more soul-crushing than arriving at camp after a miserable day of rain only to find that your sleeping bag is damp.
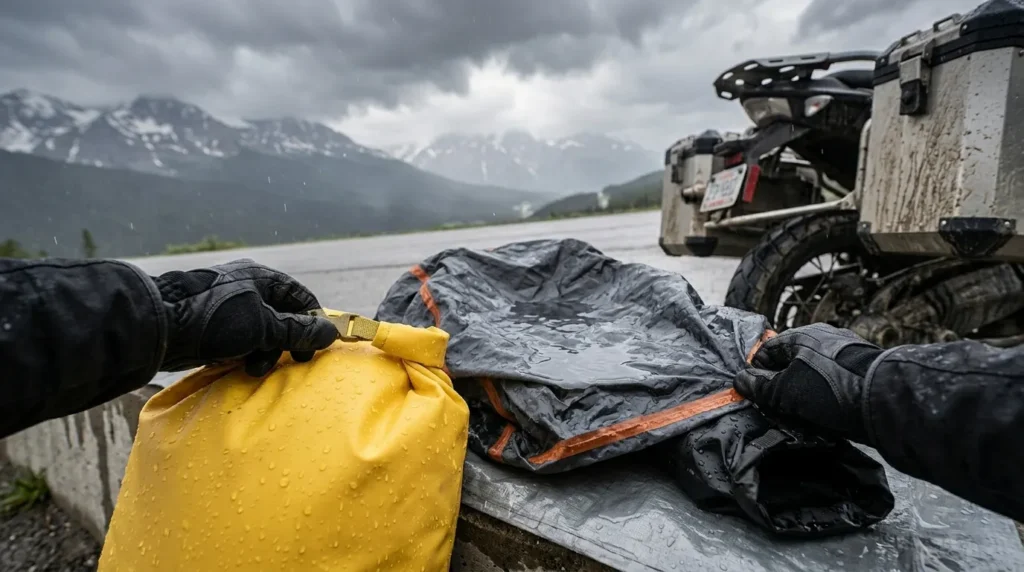
That is exactly why the Dry Bag Hack is a permanent part of my motorcycle camping checklist. I never trust my primary luggage to keep my life-support gear dry; I always use a second line of defense.
My strategy is to use individual roll-top dry bags for my tent and my sleep system before they ever go into my panniers or get strapped to my rack. This isn’t just about keeping rain out; it’s about managing the moisture you’ve already collected.
Think about this: you wake up and it’s pouring rain. You have to pack up your wet tent and hit the road. If you just shove that soaked rainfly into your main luggage, it’s going to get everything else wet, your spare clothes, your electronics, and your dry socks.
By having a dedicated dry bag for your tent, you can seal that moisture away from the rest of your gear. If you’ve read my Snugpak Scorpion 2 review, you know that its fly-first pitch is amazing for staying dry during setup, but the fly itself stays wet for a long time.
Having a separate bag for it is a total game-changer for your organization. When it comes to my sleep system, I treat it like a sacred object. I use a high-quality compression dry bag for my down bag and my inflatable pad.
Even if my bike takes a literal swim in a creek crossing (which has happened more than I’d like to admit), I know I’ll have a dry place to sleep that night.
According to the gear testers at Adventure Rider (ADVrider), the double-bagging method is the only way to guarantee 100% dryness on long-distance tours.
It also makes your morning pack-up a lot more efficient because you can just clinch and go without worrying about how you’ve layered things inside your boxes.
If you’re struggling with space, I always suggest using purge valve dry bags. These allow you to squeeze all the extra air out after you’ve rolled the top down, turning your bulky MSR Hubba Hubba NX 2 or your sleeping bag into a rock-hard, tiny cylinder.
This is the secret to fitting a full camping setup into narrow panniers or a small tail bag. In my best tent for motorcycle camping guide, I highlight pack volume as a key metric, and dry bags are the tool that helps you win that battle.
Don’t rely on luck or expensive pannier seals, invest in a few good dry bags and enjoy the peace of mind that comes with knowing your gear is safe from the elements.
Checking your work before you hit the highway
I’ve seen riders lose gear in the first mile of a trip simply because they skipped what I call the idiot check. You know that feeling when you finally get everything strapped down, your forehead is sweating, and you just want to thumb the starter and go?
That is exactly when you are most likely to have a loose strap or a bag resting against a hot exhaust pipe. Before I ever click my bike into gear, I do a methodical final walk-around that has saved my gear, and probably my skin, more times than I can count.
I start by standing behind the bike and looking at the silhouette. Is it leaning? Does one side look lower than the other?
If I’m carrying a heavy, lopsided load like the Wolf Walker Motorcycle Tent, I need to make sure I’ve balanced that weight with my heavier tools or kitchen gear on the opposite side.
If the bike looks crooked standing still, it’s going to feel even worse when you’re leaning into a high-speed sweeper.
The next thing I do is the grab and shake test. I literally grab every bag and try to rip it off the bike. If there is even a millimeter of movement, I tighten the straps.
Remember what I said about vibration? What feels tight in your driveway will settle once you hit the road. I pay extra attention to the bags I have sitting on the rear rack, like the The North Face Stormbreak 2 with its long 22-inch poles.
Because that bag is so wide, it loves to act as a lever, trying to work the straps loose. If you used Rok Straps like we discussed, this is where you give them that final cinch to make sure the elastic is fully tensioned.
According to long-distance touring experts on ADVrider, a shifting load is one of the most common causes of low-speed drops in parking lots because it changes the bike’s balance point without warning.
I also do a clearance check. I run my hand between my bags and the rear tire, and I check the distance between my soft luggage and the exhaust.
I’ve seen beautiful, expensive bags like the ones I mentioned in my Snugpak Scorpion 2 review melt into a puddle of goo because they shifted an inch closer to the muffler during a ride.
If you’re running soft bags without a rack, you absolutely must use a heat shield. Finally, I check my own access. Can I get to my rain gear or my motorcycle camping checklist without unstrapping the whole bike?
If you have to perform a full yard sale just to get a snack or a tire gauge, you’ve failed the packing test. Take the extra five minutes to do this walk-around.
It’s the difference between a stress-free ride and spending your afternoon on the side of the road picking up your socks.
FAQ: Mastering your motorcycle packing strategy
It absolutely does. If you’re on a tall adventure bike like a BMW GS, you have a lot of vertical space, but you have to be careful about making the bike too top-heavy. On a cruiser like a Harley-Davidson Heritage, your center of gravity is already low, but you have less ground clearance, so wide panniers can be a drag in the corners. I’ve found that no matter what you ride, the Heavy Low, Light High rule is the universal truth. In my best tent for motorcycle camping guide, I break down which tents work best for different bike geometries, because a tent that fits on a massive tourer might be a nightmare on a small dual-sport.
This is the most common packing frustration I see. As I mentioned in my ALPS Mountaineering Lynx 2 review, those 21-inch poles are just too long for most panniers. My expert insight is to take the poles out of the tent bag entirely. Slide them into a separate protective sleeve and strap them along the top of your frame rails or inside your rear luggage rack using simple zip-ties or a small strap. This allows you to squash the actual tent fabric into a much smaller, squishy ball that can be stuffed into any corner of your panniers. It’s a pro move that makes even the most awkward tents suddenly very packable.
Personally, I prefer a high-quality dry bag over a hard top-case for camping. Top-cases are great for commuting, but for camping, they sit very high and far back, which is the worst place for weight. A dry bag, like the ones I discussed in my Kelty Late Start 2 review, is flexible. You can strap it further forward onto the passenger seat, which centralizes the mass. Plus, if you drop the bike off-road, a dry bag won’t shatter or bend your subframe like a heavy aluminum top-case might.
When you add 40 or 50 pounds of camping gear, your suspension is going to sag. If you don’t adjust for this, your bike will feel like a wet noodle in the corners. Most modern bikes have a preload adjustment on the rear shock. Before you head out, crank that preload up to compensate for the extra weight. This keeps the bike’s geometry correct so it still turns predictably. I learned this the hard way while testing the MSR Hubba Hubba NX 2 in the mountains; without adjusting my preload, the bike was scraping its pegs on every minor turn.
Double-bag everything. Even if your panniers are waterproof, use internal dry bags for your life-support items like your sleeping bag and dry clothes. I also suggest packing your tent in a way that you can get to it without opening your main bags. If it’s pouring rain, you want to be able to set up your shelter fast and then move your dry gear from the bike into the tent. If you have to dig through your clothes to find your tent stakes, everything is going to get soaked. Being organized is your best defense against a miserable, wet night.
Conclusion: The art of the perfect pack
Packing a motorcycle for a camping trip is an art form that you’ll refine with every mile you ride. It’s a constant balancing act between comfort at camp and performance on the road.
Don’t be discouraged if your first few attempts feel clunky; even the pros spend time re-arranging their gear at gas stops. The goal is to reach a point where your bike feels natural despite the extra weight.
By following the golden triangle method and ditching those dangerous bungees for real straps, you’re already ahead of 90% of the riders out there.
Remember, the lighter and more compact your gear is, the easier this whole process becomes. That’s why I’m such a stickler for pack volume in my best tent for motorcycle camping guide.
A tent that fits inside your bags is a tent that doesn’t mess with your head or your handling. Take your time, do your final walk-around, and keep the Heavy Low rule in mind.
Once you get the balance right, the bike will disappear underneath you, and you can focus on what actually matters: the road ahead.
I’ll see you at the next trailhead.